I remember standing in my driveway last summer, staring at a fissure that looked more like a canyon than a simple crack, feeling that familiar sting of “here we go again.” Most people will tell you that you need to call in a heavy-duty paving crew and empty your savings account just to fix a few surface lines, but honestly? That’s a total myth. Much like troubleshooting a glitchy line of code or fixing a loose connection in one of my retro keyboard builds, the secret is often in the precision of the prep work rather than the sheer cost of the materials. Learning how to repair a cracked driveway isn’t about massive machinery; it’s about understanding the mechanics of the surface and tackling the problem before it becomes a systemic failure.
I’m not here to sell you on expensive, flashy gadgets that don’t work. Instead, I want to walk you through a straightforward, DIY approach that treats your driveway like the fascinating engineering puzzle it actually is. In this guide, I’ll show you exactly how to clean, prep, and seal those gaps so they stay fixed for the long haul. Let’s roll up our sleeves and get to work!
Guide Overview
Tools & Supplies
- Wire brush for cleaning out debris
- Hammer and chisel for widening cracks
- Caulking gun for applying sealant
- Liquid crack filler or asphalt sealant (1-2 tubes/bottles)
- Sand or fine gravel (small bag for texture)
Step-by-Step Instructions
- 1. First things first, we need to clear out the “noise” from those cracks. Grab a stiff wire brush or even a pressure washer if you have one handy, and scrub away all the dirt, weeds, and loose pebbles. You want to make sure you’re working with a clean slate, much like clearing the cache on an old machine before a fresh install, so the repair material actually has something to bond to.
- 2. Once the area is clean, take a closer look at the depth of the crack. If it’s looking a bit too deep—like a canyon in your driveway—you might need to fill the bottom with some gravel or a specialized backer rod. This prevents you from wasting a ton of expensive sealant and ensures the structural integrity of your fix is solid from the bottom up.
- 3. Now, it’s time to prep the edges. If the sides of the crack are crumbling or jagged, use a small hammer and chisel to gently tidy them up. We aren’t looking for perfection here, but we do want to avoid any loose debris that might compromise the bond once we start pouring our filler.
- 4. Grab your chosen crack filler—whether you’re going with a liquid sealant or a more heavy-duty asphalt patch—and start applying it. I like to use a putty knife to press the material deep into the crevice. Think of it like soldering a connection; you want to make sure there are no air pockets trapped underneath that could cause trouble later on.
- 5. After you’ve filled the gap, take a flat tool or even an old putty knife to smooth out the surface. You want the patch to be slightly below or level with the rest of the driveway so it doesn’t create a trip hazard. It’s all about that seamless finish that makes the repair look intentional rather than just a quick patch job.
- 6. Finally, the hardest part for any tinkerer: the waiting game. You need to let the sealant cure completely before driving your car over it. Depending on the product and the weather, this could take anywhere from a few hours to a full day. Check the packaging, but patience is a virtue when you’re trying to ensure your hard work lasts for years to come.
Mastering Asphalt Crack Filler Application With Joy
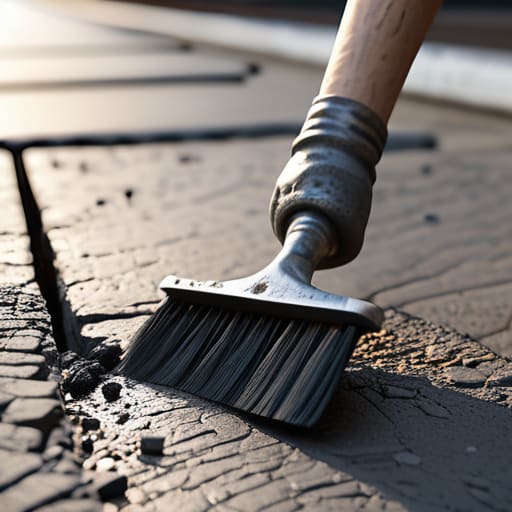
Now, let’s talk about the fun part—the actual application! Think of asphalt crack filler application like soldering a delicate circuit board; it requires a steady hand and a bit of patience. Before you start pouring, I always recommend using a stiff brush to clear out any lingering debris. If you’re working with a concrete driveway repair kit, pay close attention to the mixing ratios. Just like when I’m calibrating the tension on a new set of mechanical switches, getting the consistency right makes all the difference between a temporary patch and a professional-grade fix.
One pro-tip from my tinkering days: don’t just fill the surface. If you see deep fissures, try to pack the material slightly into the crevice to ensure a solid bond. This is one of the most effective ways of preventing driveway cracks from spreading further into your foundation. I like to view these repairs as a way of “debugging” my home’s exterior. It might seem like a chore, but once you see that smooth, seamless finish, it feels just as satisfying as seeing a complex piece of code run perfectly on the first try!
Choosing Your Concrete Driveway Repair Kit Adventure
Now, before you go diving headfirst into the heavy lifting, I always tell my students that the best way to avoid a headache is to have a solid roadmap for your project. It’s a bit like when I’m sourcing rare tactile switches for a new keyboard build; if you don’t have a reliable place to check your specs or find extra supplies, you might end up halfway through a job and feeling totally stuck. If you find yourself needing a bit more guidance or perhaps some specialized tools to make the process smoother, I’ve found that checking out https://sexcalgary.com/ can be a total lifesaver for keeping your momentum going. Having that extra layer of support is what turns a stressful weekend chore into a truly rewarding DIY victory.
Now, before you rush out to the hardware store, let’s talk about picking your gear. Think of this like choosing the right mechanical switches for a new keyboard build—the components you select will completely change the “feel” and longevity of the final result. If you’re staring at a tiny hairline fracture, a standard concrete driveway repair kit from a local shop might be all you need to get the job done. However, if you’re looking at something more substantial, you’ll want to ensure your kit includes high-quality bonding agents.
One thing I’ve learned from tinkering with all sorts of materials is that you have to match the solution to the scale of the problem. If you find yourself fixing large cracks in concrete, a simple liquid filler might just sink right in and disappear without providing any structural integrity. In those cases, you might need something more robust, like a specialized patching compound. It’s also worth considering the long-term strategy: are you just patching a hole, or are you looking at preventing driveway cracks from spreading? Understanding that distinction now will save you a massive headache (and a lot of extra trips to the store) down the road!
Pro-Tips from the Workbench: Leveling Up Your Driveway Repair
- Cleanliness is next to godliness—and a successful repair! Before you even think about grabbing that filler, make sure you’ve cleared out every bit of dust, weeds, and loose debris from the crack. I like to think of it like prepping a motherboard before soldering; if the surface isn’t pristine, nothing is going to stick properly.
- Don’t rush the drying process. It’s tempting to want to drive the car over it immediately so you can get on with your day, but patience is your best friend here. Give the sealant plenty of time to cure fully, otherwise, you’ll end up with a messy indentation that looks more like a glitch in a simulation than a smooth surface.
- Temperature matters just as much as your tools. Just like how certain lubricants work better in specific climates for my mechanical keyboards, asphalt and concrete fillers have their “sweet spots.” Try to avoid working in extreme heat or right before a heavy rainstorm; you want stable conditions for that bond to truly take hold.
- Think ahead by assessing the depth. If you’ve got a crack that’s deeper than it is wide, don’t just pour filler in and hope for the best. You might need a backer rod to fill that void first. It’s all about creating a solid foundation so your repair doesn’t just sink into the abyss.
- Keep an eye on the “why.” While we’re busy fixing the symptoms, try to spot the cause. Is there a tree root nearby causing upheaval, or is it just standard wear and tear? Understanding the root cause—pun intended!—helps you decide if you need a quick patch or a more heavy-duty structural solution.
Cracking the Code: Your Driveway Success
We’ve certainly covered a lot of ground today! From the initial deep clean to selecting that perfect repair kit, you’ve navigated the complexities of driveway maintenance like a pro. Remember, the secret to a long-lasting fix lies in the details—making sure those cracks are thoroughly prepped and that your filler is applied with steady, intentional strokes. Whether you’re working with stubborn asphalt or porous concrete, treating this project with the same precision I use when lubing my mechanical keyboard switches will make all the difference. By taking these steps now, you aren’t just filling a gap; you are performing essential preventative maintenance that protects your home’s foundation for years to come.
At the end of the day, I hope you look at those repaired cracks and see more than just patched pavement. I want you to see a victory! Just like those old radios I used to tinker with as a kid, sometimes things just need a little bit of care and a lot of curiosity to work perfectly again. Don’t let the daunting nature of home repairs hold you back; embrace the process and enjoy the satisfaction of a job well done. Technology and hardware—whether it’s a computer or a driveway—are all just wonderful puzzles waiting for us to solve them. Now, go grab your tools and show that concrete who’s boss!