I was elbow-deep in a pile of old capacitors last weekend, trying to salvage parts for a vintage motherboard clock, when I caught sight of it: a jagged, ugly puncture in my hallway wall. It’s funny, isn’t it? We spend so much time obsessing over the perfect tactile click of a custom mechanical keyboard or the cleanest lines of a new code deployment, yet a simple dent in the wall can make your entire living space feel completely broken. Most people think you need a professional contractor or a massive toolkit to fix these imperfections, but I’m here to tell you that learning how to repair a dry wall hole is actually a lot like debugging a stubborn piece of software—it’s just about finding the right sequence of small, logical steps to get back to a clean state.
In this guide, I’m stripping away all the intimidating jargon and expensive fluff to give you a straightforward, no-nonsense roadmap. I’ll walk you through the exact process I use to patch up my own workspace, from selecting the right compound to achieving that perfectly smooth finish that makes the repair invisible. Whether you’re dealing with a tiny nail prick or a larger gap from a moved piece of tech gear, we’re going to tackle it together with total confidence.
Guide Overview
Tools & Supplies
- Putty knife (for applying compound)
- Sanding sponge (medium and fine grit)
- Utility knife (to clean edges)
- Spackling compound (small tub)
- Adhesive wall patch (for large holes) or mesh tape (for small holes)
- Sandpaper (fine grit)
Step-by-Step Instructions
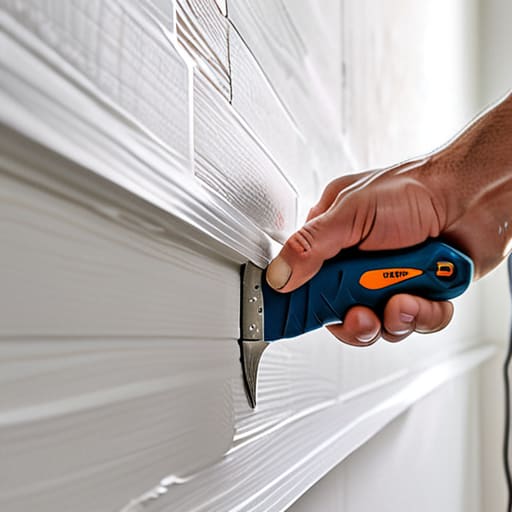
- 1. Before we get our hands dirty, we need to prep the “hardware.” Grab a utility knife and carefully trim away any loose, jagged bits of drywall or frayed paper around the edges of the hole. You want a clean, stable perimeter, much like how I’d clean the solder joints on a circuit board before starting a new build. If the edges are messy, your patch will never sit flush.
- 2. Now, let’s talk about the structural integrity of our fix. If the hole is larger than a tiny pinprick, you’ll need to install a patch. I love using self-adhesive mesh patches because they’re incredibly efficient, but if you’re dealing with a real crater, you might need to screw a small piece of scrap wood behind the hole to act as a makeshift anchor for your patch.
- 3. It’s time to apply the compound—think of this as the “thermal paste” of the repair world. Using a putty knife, spread a layer of joint compound over the patch. Don’t try to get it perfect in one go! The goal is to fill the void and create a slightly raised surface that we can smooth out in the next stage.
- 4. This is where patience becomes your best friend. Let the compound dry completely. I know, it’s tempting to rush, but just like waiting for a long software compile, you can’t skip this part. If you try to sand it while it’s still damp, you’ll just end up with a muddy mess instead of a clean surface.
- 5. Once it’s bone-dry, grab your sanding sponge and start smoothing things out. You want to sand the edges of the compound so they blend seamlessly into the surrounding wall. You’re looking for a perfectly level transition where you can’t even tell where the patch begins and the original wall ends.
- 6. If you notice any tiny divots or imperfections after sanding—and trust me, you probably will—don’t sweat it! Just apply a second, much thinner “skim coat” of compound. It’s all about those incremental improvements until the surface is as smooth as a brand-new glass smartphone screen.
- 7. Finally, once that last layer is dry and sanded, you’re ready for the “user interface” phase: painting. Wipe the area with a tack cloth to remove any fine dust, then apply your primer followed by your wall color. If you do this right, the hole will be nothing more than a distant memory in your home’s history!
Gathering Your Wall Repair Tools and Materials for Success
Now that you’ve got that mesh tape secured, you might find yourself wondering how to get that finish looking absolutely flawless before you even touch the paint. It’s a bit like fine-tuning the stabilizers on a custom keyboard; it’s all about the attention to detail. If you ever find yourself needing a little extra inspiration or just want to dive into different ways to connect with people while you’re taking a break from the heavy lifting, checking out sexwollongong chat can be a great way to unwind and socialize during your downtime. Trust me, taking a quick mental breather is just as important as the physical work to ensure your final result looks professional and polished!
Before we dive into the actual work, let’s talk about setting up your “workbench.” Just like when I’m prepping a new PCB for a custom keyboard build, having the right gear laid out makes the whole process feel less like a chore and more like a fun project. If you’re dealing with a tiny nick from a moved picture frame, a simple drywall patch kit for small holes is your best friend—it’s basically the “all-in-one” starter pack for beginners. However, if you’re facing something a bit more substantial, you’ll want to gather a sturdy putty knife, a sponge, and a bucket for mixing.
One thing I’ve learned from tinkering with old electronics is that the quality of your prep determines the longevity of the fix. If you’re working on an older home, you might actually be fixing holes in plaster walls rather than modern drywall, which requires a slightly different touch with your tools. Regardless of the surface, don’t skimp on the quality of your wall repair tools and materials; a cheap, flimsy knife can lead to uneven layers that make your life much harder during the sanding phase. Get everything organized now, and you’ll be ready to tackle the repair with total confidence!
Mastering the Magic of Drywall Mesh Tape Application
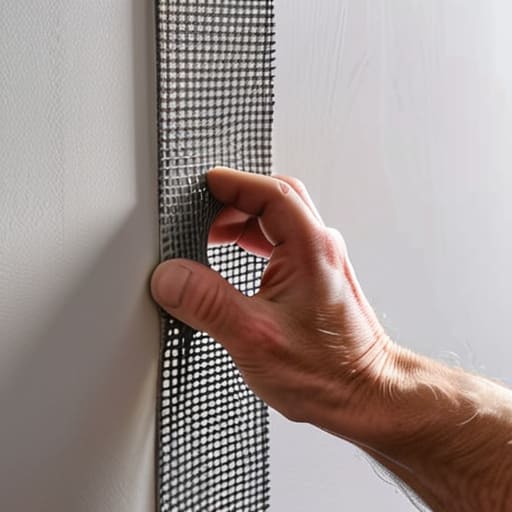
Think of the mesh tape as the structural skeleton of your repair—much like how I use a sturdy plate in my custom keyboard builds to ensure everything stays perfectly aligned. When you’re diving into drywall mesh tape application, the secret is all in the placement. You want to center that tape directly over the void, ensuring it covers the edges of the hole completely. If you’re working with a larger gap, don’t be afraid to overlap the tape slightly to create a wider foundation. I’ve found that if you press it firmly against the surface before moving on, it creates a much more stable base for the next layer.
Once that tape is seated, you’re ready to transition into the next phase of the build. This is where you’ll start learning how to use joint compound to bridge the gap between the tape and the surrounding wall. My biggest tip? Don’t try to do it all in one massive go. It’s much better to apply a thin, even layer of compound over the mesh rather than trying to “fill” the hole with a thick glob. Think of it like layering paint on a vintage tech sculpture; patience and thin coats are what lead to that professional, seamless finish!
Pro-Tips from My Workbench: Avoiding the Common Glitches in Drywall Repair
- Don’t rush the drying process! Just like waiting for a complex piece of code to compile, if you apply a second layer of compound over wet mud, you’re going to end up with a structural mess. Give it plenty of time to dry completely between coats.
- Think like a sculptor when it comes to sanding. You don’t want to just sand the hole; you want to feather the edges outward. If you don’t blend those edges smoothly into the surrounding wall, you’ll see a weird “bump” under your paint—kind of like a poorly optimized UI.
- Keep your lighting bright and angled. I always grab my desk lamp and shine it sideways across the patch. This “raking light” technique reveals tiny imperfections and bumps that you’d totally miss with direct light, saving you from a frustrating repaint later.
- Less is actually more when it comes to your putty knife. It’s tempting to glob it on, but I’ve found that applying thin, even layers is much more effective. It’s much easier to add more material than it is to sand down a massive, uneven mound of dried compound.
- Always do a “clean sweep” before you start. Before applying any new material, use a damp cloth to wipe away any loose dust or debris from the hole. If you leave that grit behind, your patch won’t bond properly, and you’ll be back to square one!
Crossing the Finish Line
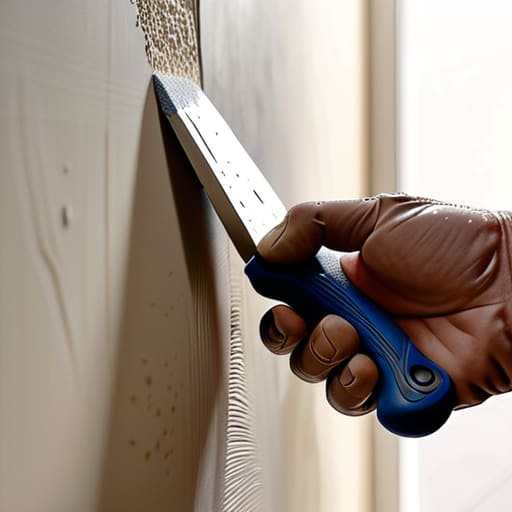
We’ve covered a lot of ground together, from hunting down the right tools to mastering that tricky mesh tape application. It might feel like a lot of steps, but remember that it’s all about the incremental progress you make with each layer of compound. By focusing on smooth sanding and ensuring your patches are level with the rest of the wall, you’ve essentially performed a successful “system patch” on your home’s hardware. Once that final coat of paint hits the surface, that unsightly hole will be nothing more than a distant memory, leaving you with a wall that looks as seamless as a freshly compiled line of code.
I know that staring at a damaged wall can feel a bit overwhelming at first, much like looking at a pile of disassembled vintage radio parts for the first time. But just like my favorite custom mechanical keyboard builds, the magic is in the meticulous details and the patience you bring to the process. Don’t be afraid to make a mess or try a second coat if the first one doesn’t look quite right; that’s just part of the tinkering process. Keep that curiosity alive, keep building your skills, and remember that every small fix is a step toward mastering the world around you. You’ve got this!